


This simple tutorial will be using the HTML5 Drag-and-Drop API with the Files API to create a simple drag and drop file reader that you can use in your projects with just a few lines.
You can then drag and drop files into your target created with this tutorial to read their data and later use it for whatever you want.
Let's get to the code.
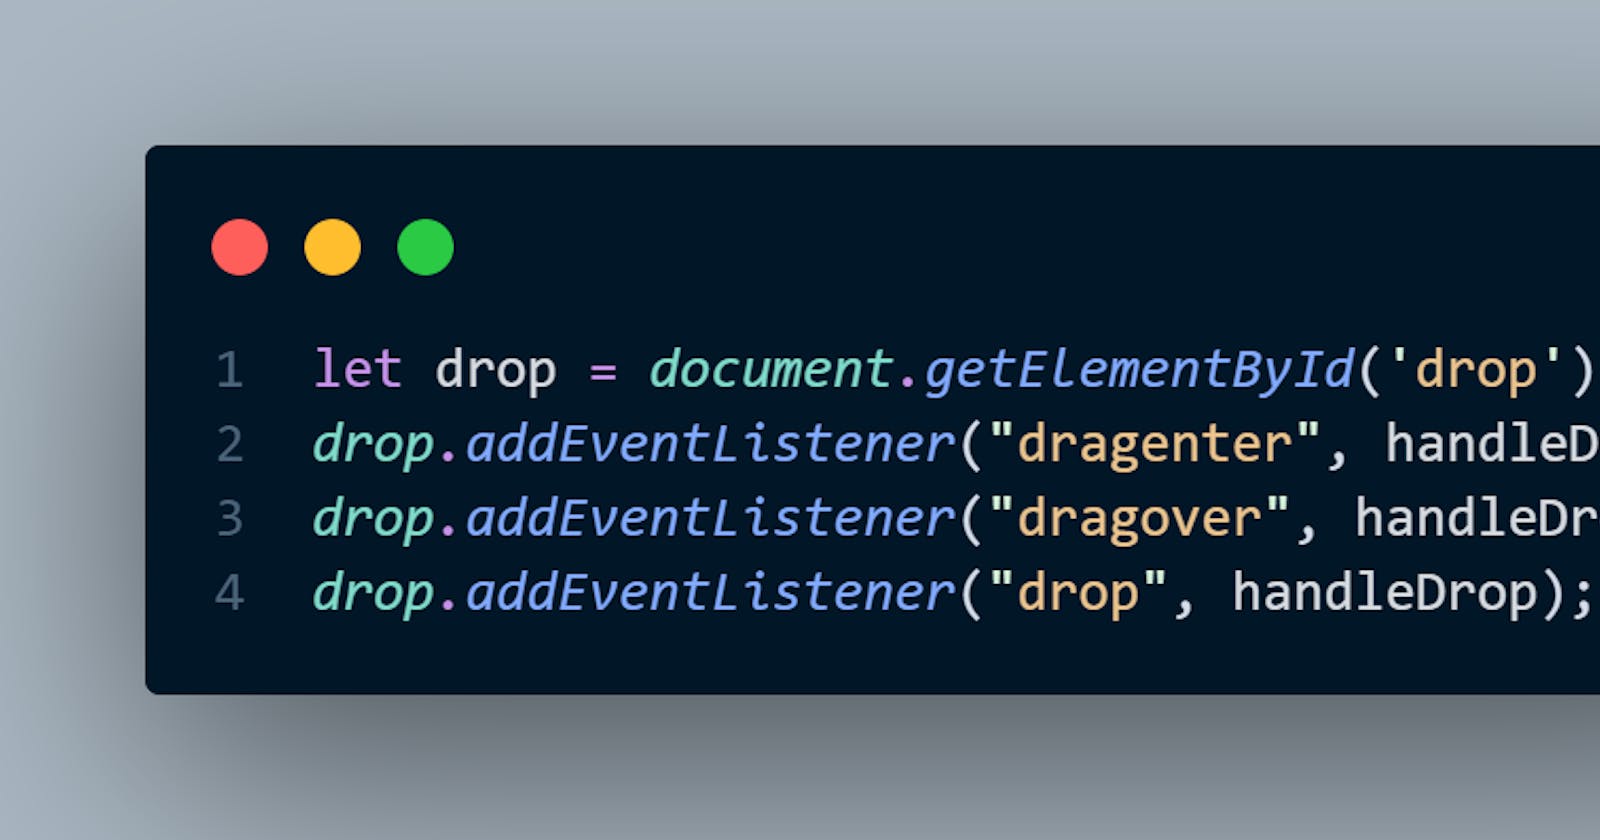
let drop = document.getElementById('drop');
drop.addEventListener("dragenter", handleDrop);
drop.addEventListener("dragover", handleDrop);
drop.addEventListener("drop", handleDrop);
First, create a reference to the drop target on line 1. Add the listeners;
- dragenter which listens for any drag activity that enters the drop area.
- dragover which listens for any element dragged over the drop.
- drop which listens for any item dropped unto the area.
All these listeners have a function that handles the various events called handleDrop, so let's create that function
function handleDrop(event) {
    event.preventDefault();
    let data = "",
        details = document.getElementById("details"),
        files, i = 0,
        length,
        url;
    if (event.type === "drop") {
        files = event.dataTransfer.files;
        length = files.length;
        while (i < length) {
            url = window.URL.createObjectURL(files[i]);
            data += `File details <br> Name: ${files[i].name} <br> Type: ${files[i].type} <br> Size: ${files[i].size} bytes) <br> <img src="${url}" />`;
            i++;
        }
        details.innerHTML = data;
    }
}
In creating the handler, the listener passes the event to this function and the first thing we want to do is prevent the default behavior of the event since we are customizing what we want to do with the event data.
We then create
- data, which will hold the final string we will put on our page using the information we get from the file uploaded.
- details, a reference to where in the page, we will be displaying the data above.
- files, which will hold each file dragged and dropped unto our area.
- i, which will help us get individual elements in the files dropped.
- length, will be the number of items dropped.
- url, will be a reference to the data above also termed as our blob. This we can use to display the image dropped on our area.
We then check for the event to be sure it is a drop, if it is, we store the files dropped in files and the number of files in length.
Go over each file with the while loop;
- create a Blob with window.URL.createObjectURL(files[i]) which we can then pass to our img element in the data string created afterwards.
- Pass the data string to our page to view the details of the file(s) dropped.
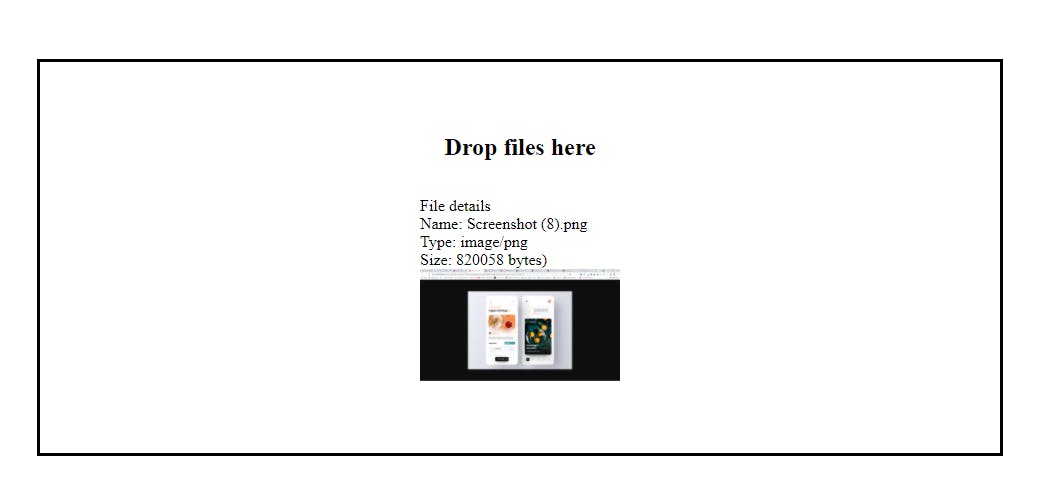
This is an example of what to see.
Hope you got that! You can do whatever you want to the files just dropped. Cheers